SPS Website Google Calendar Usage
In order to allow events to be loaded into the website in a user friendly manner, the SPS website reads data from Google Calendar. This guide will help explain effective use of Google Calendar in order to optimize event display on the SPS Website. Google Calendar is accessed at calendar.google.com. You should be signed into the SPS email account.
Creating an Event
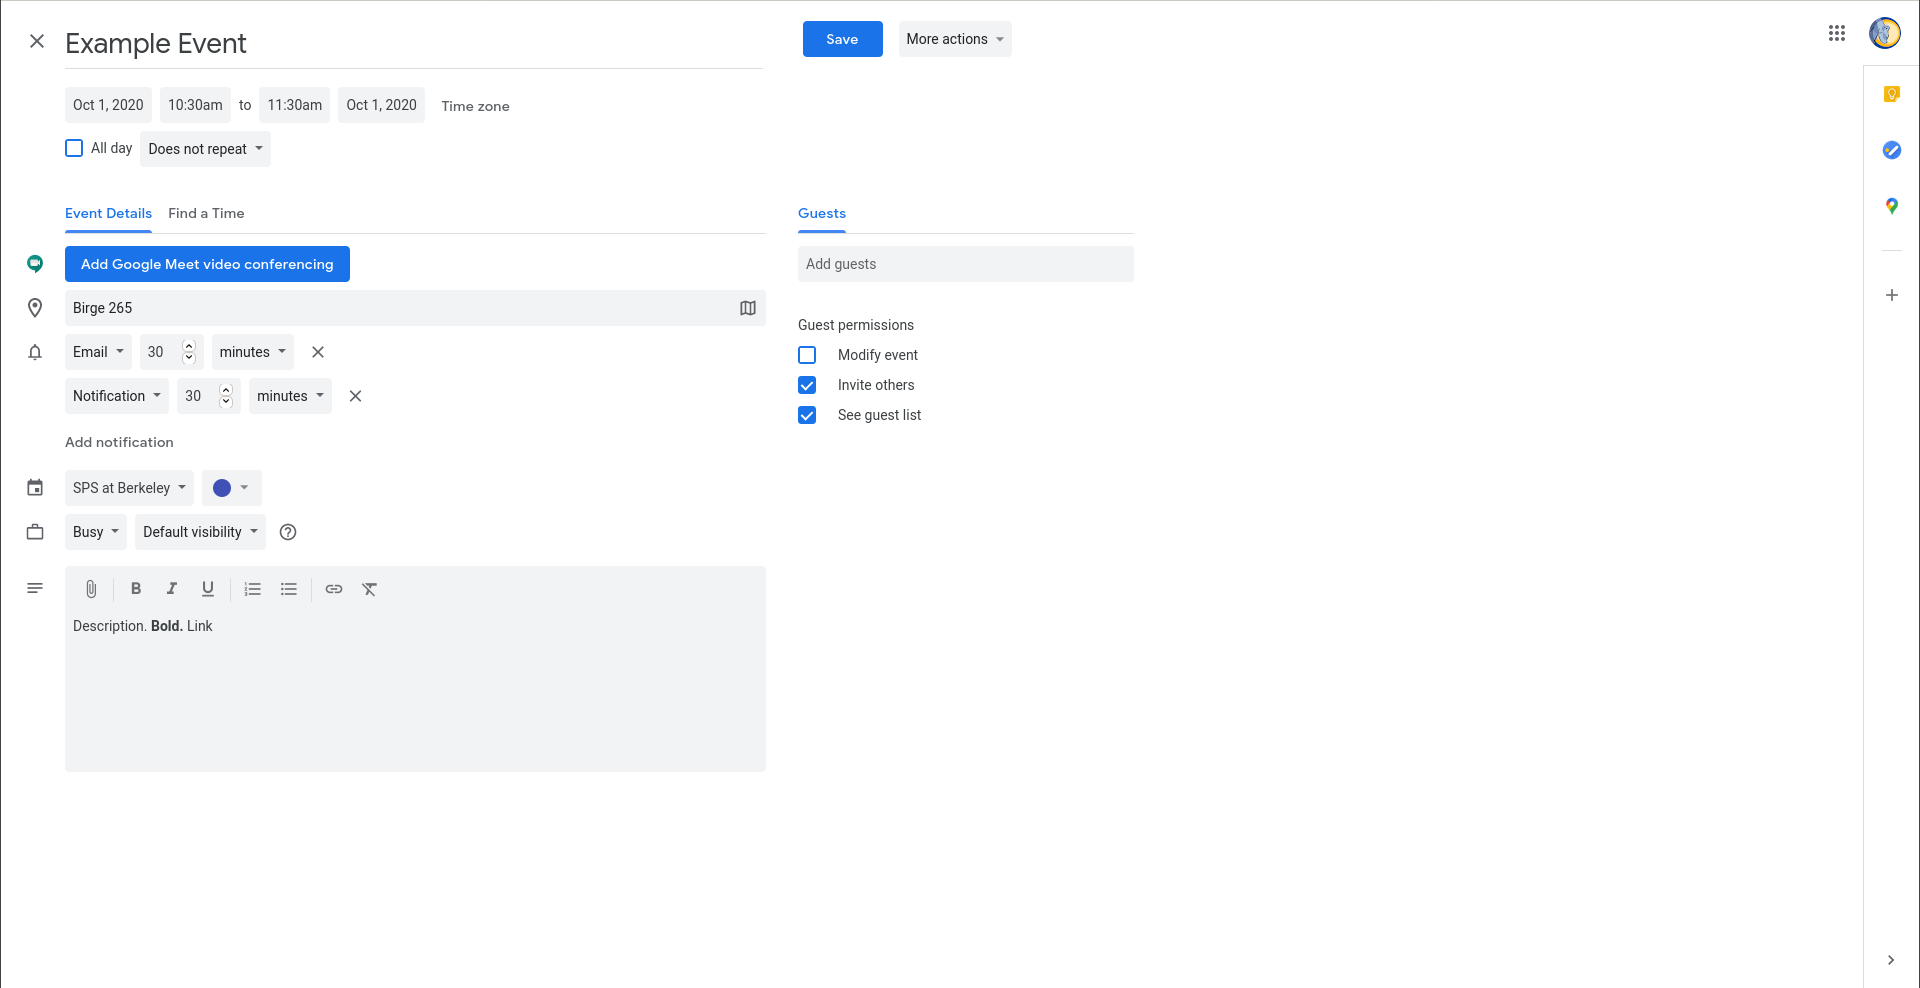
The atomic Google Calendar entry is the event. Events can be created by clicking a time on the Google Calendar. This will open the panel shown below.
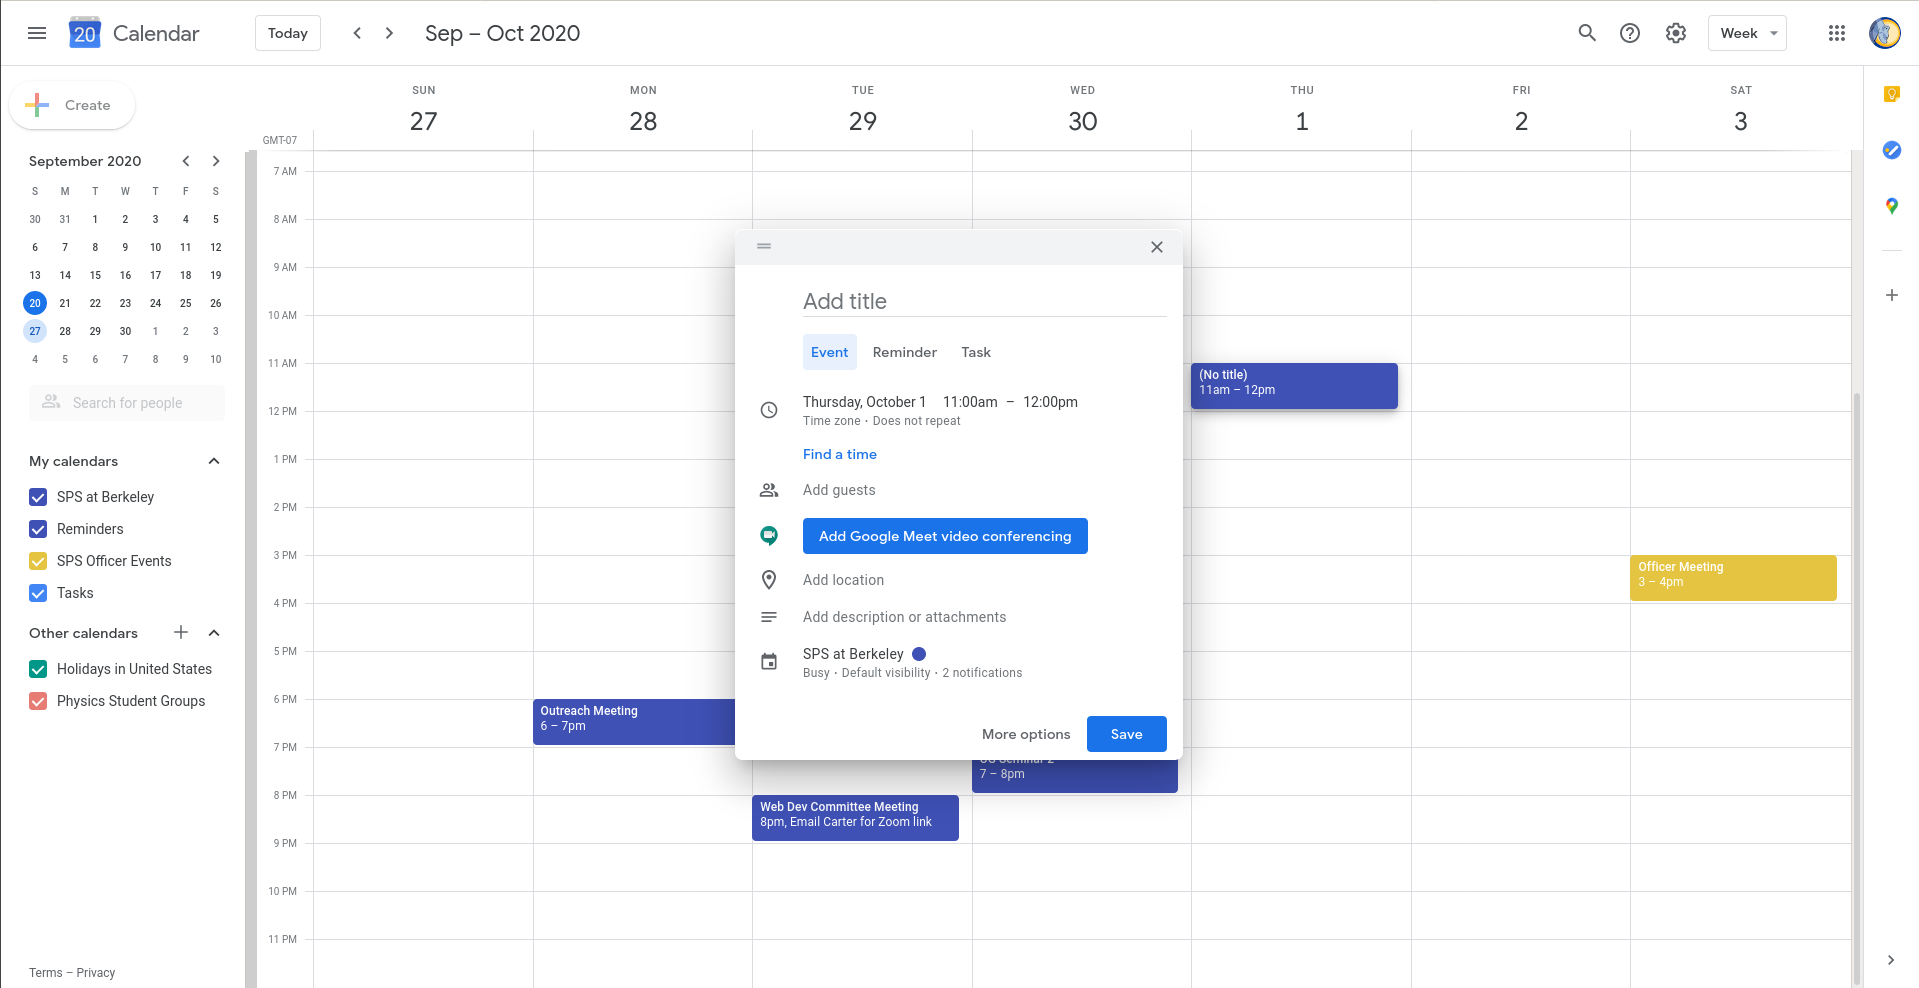
The most important entries are the title (set by clicking the text box labelled Add title) and the time (set by clicking the time). Most events will not be repeating. Unless you are using different time zones for the start and end time, do not set the time zone. Pacific Time is the default.

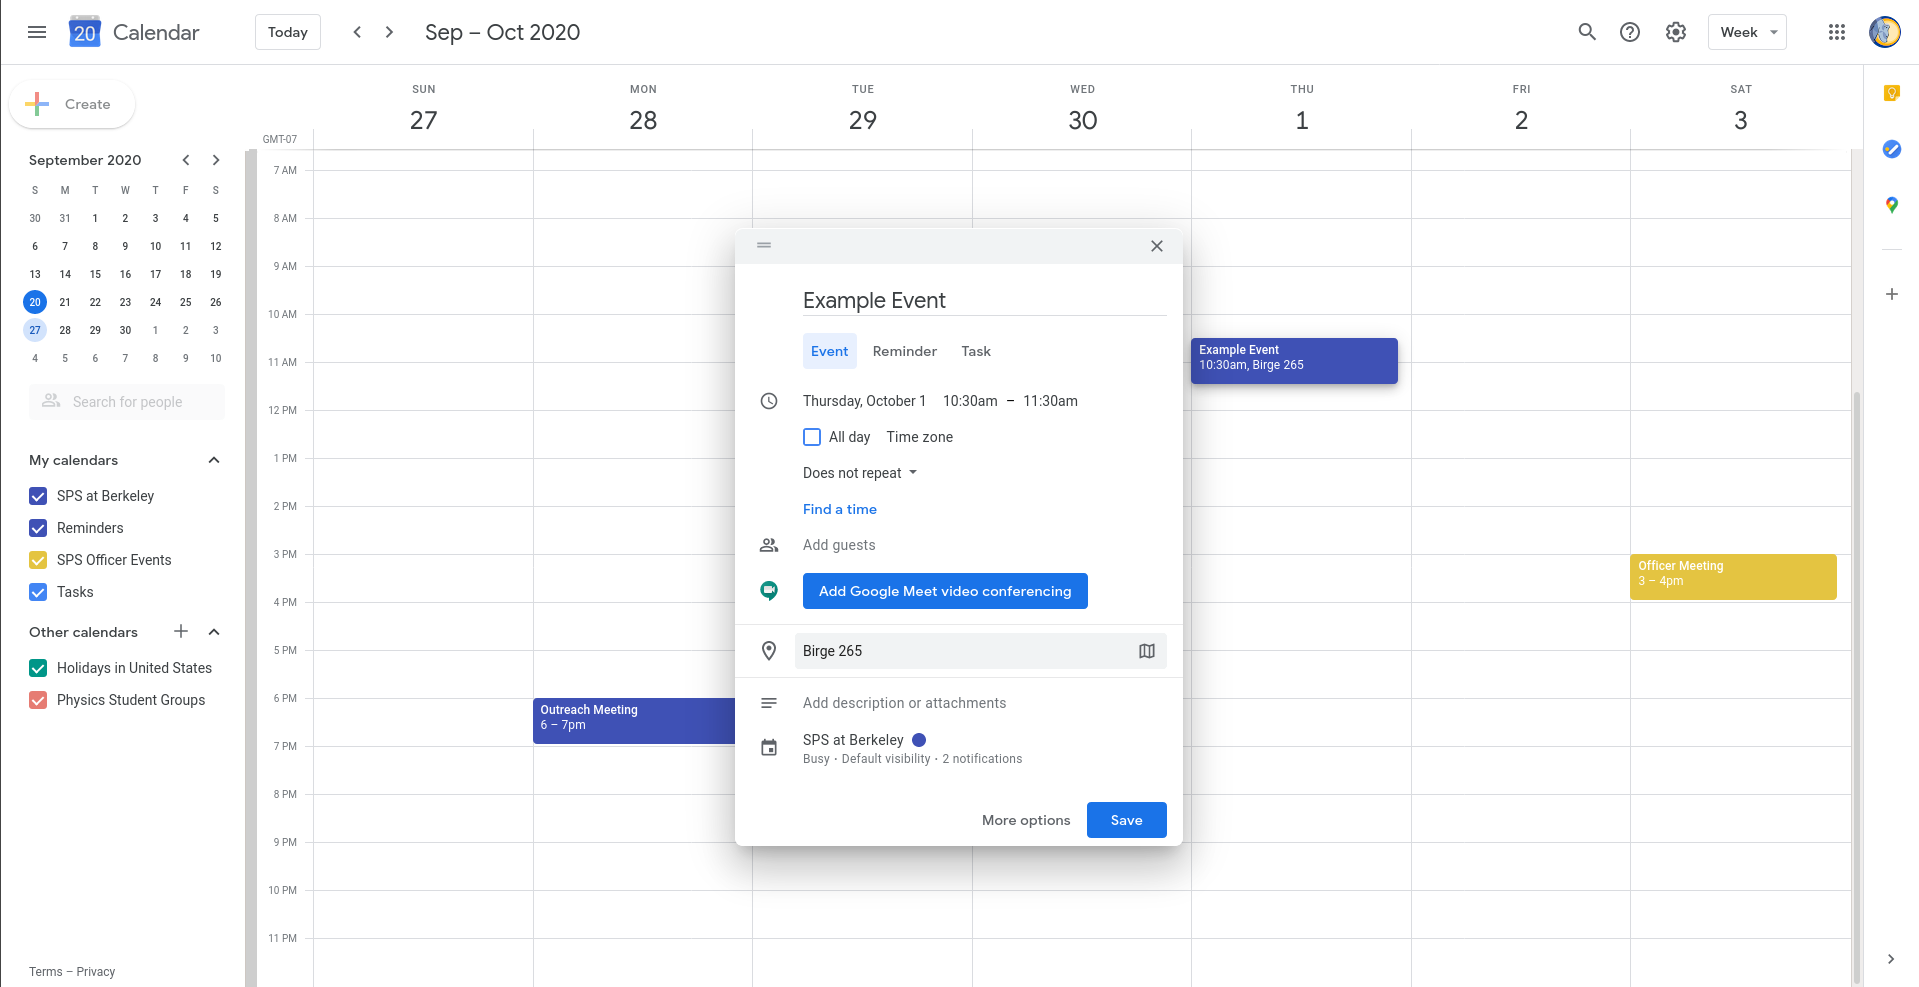
If relevant, a location can be added. The location can be any short piece of text. Typically, this would be a building name and room number. Ignore autocomplete suggestions, they are not particularly useful (you can make these go away by clicking outside the box (but inside the event creation pop-up) or by pressing the escape key once). In principle, a URL could be added here, but this should be avoided if there is not authentication. Do not put Zoom links in the location field.
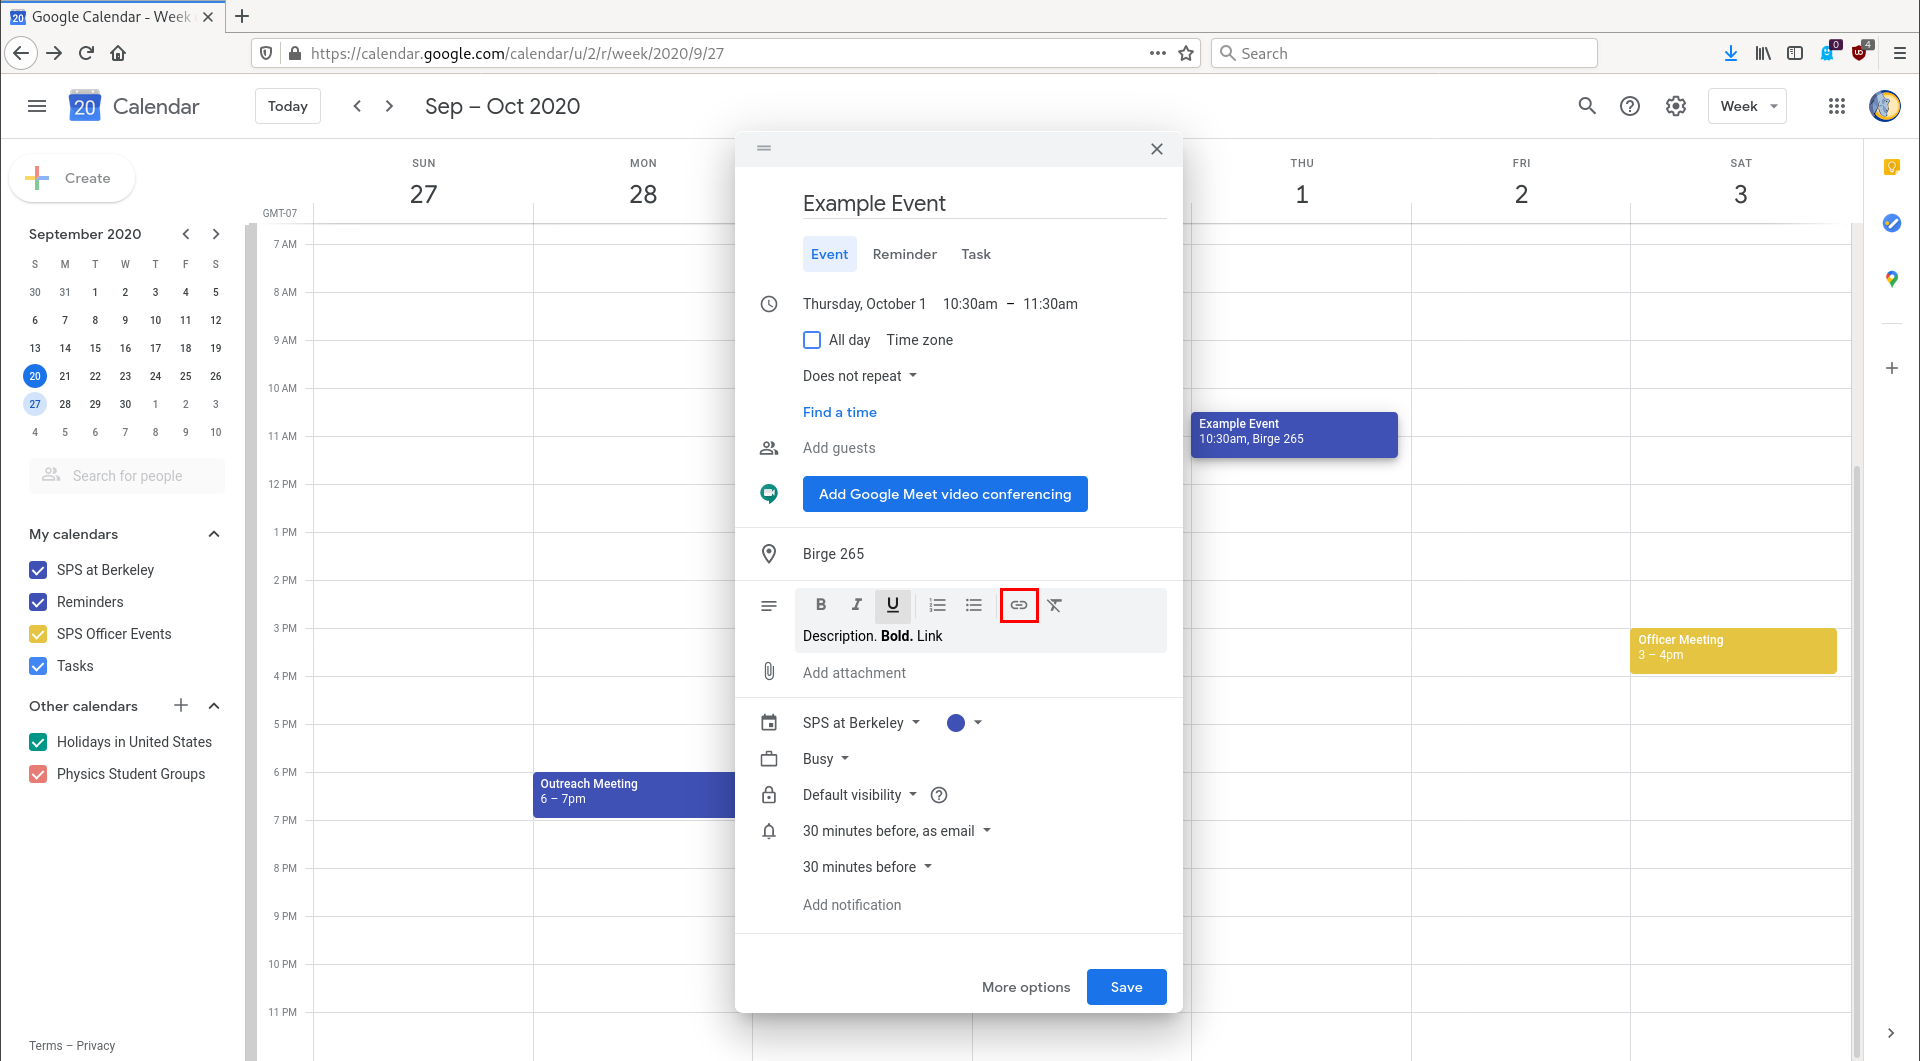
A description should usually be added. Attachments should generally not be added. To add a description, click on the word description. All of the formatting options for the description box will render appropriately on the main site. The most important of these is links. Links should usually be shortened using the link button (highlighted in the image below).
Finally, ensure that the calendar is set to SPS at Berkeley. The calendar SPS Officer Events is also available, but should only be used for officer events. Conversely, officer events should never be put on the main calendar. It is safe to put Zoom links in the SPS Officer Events calendar, as this calendar is only shared with SPS officers (not the general public).
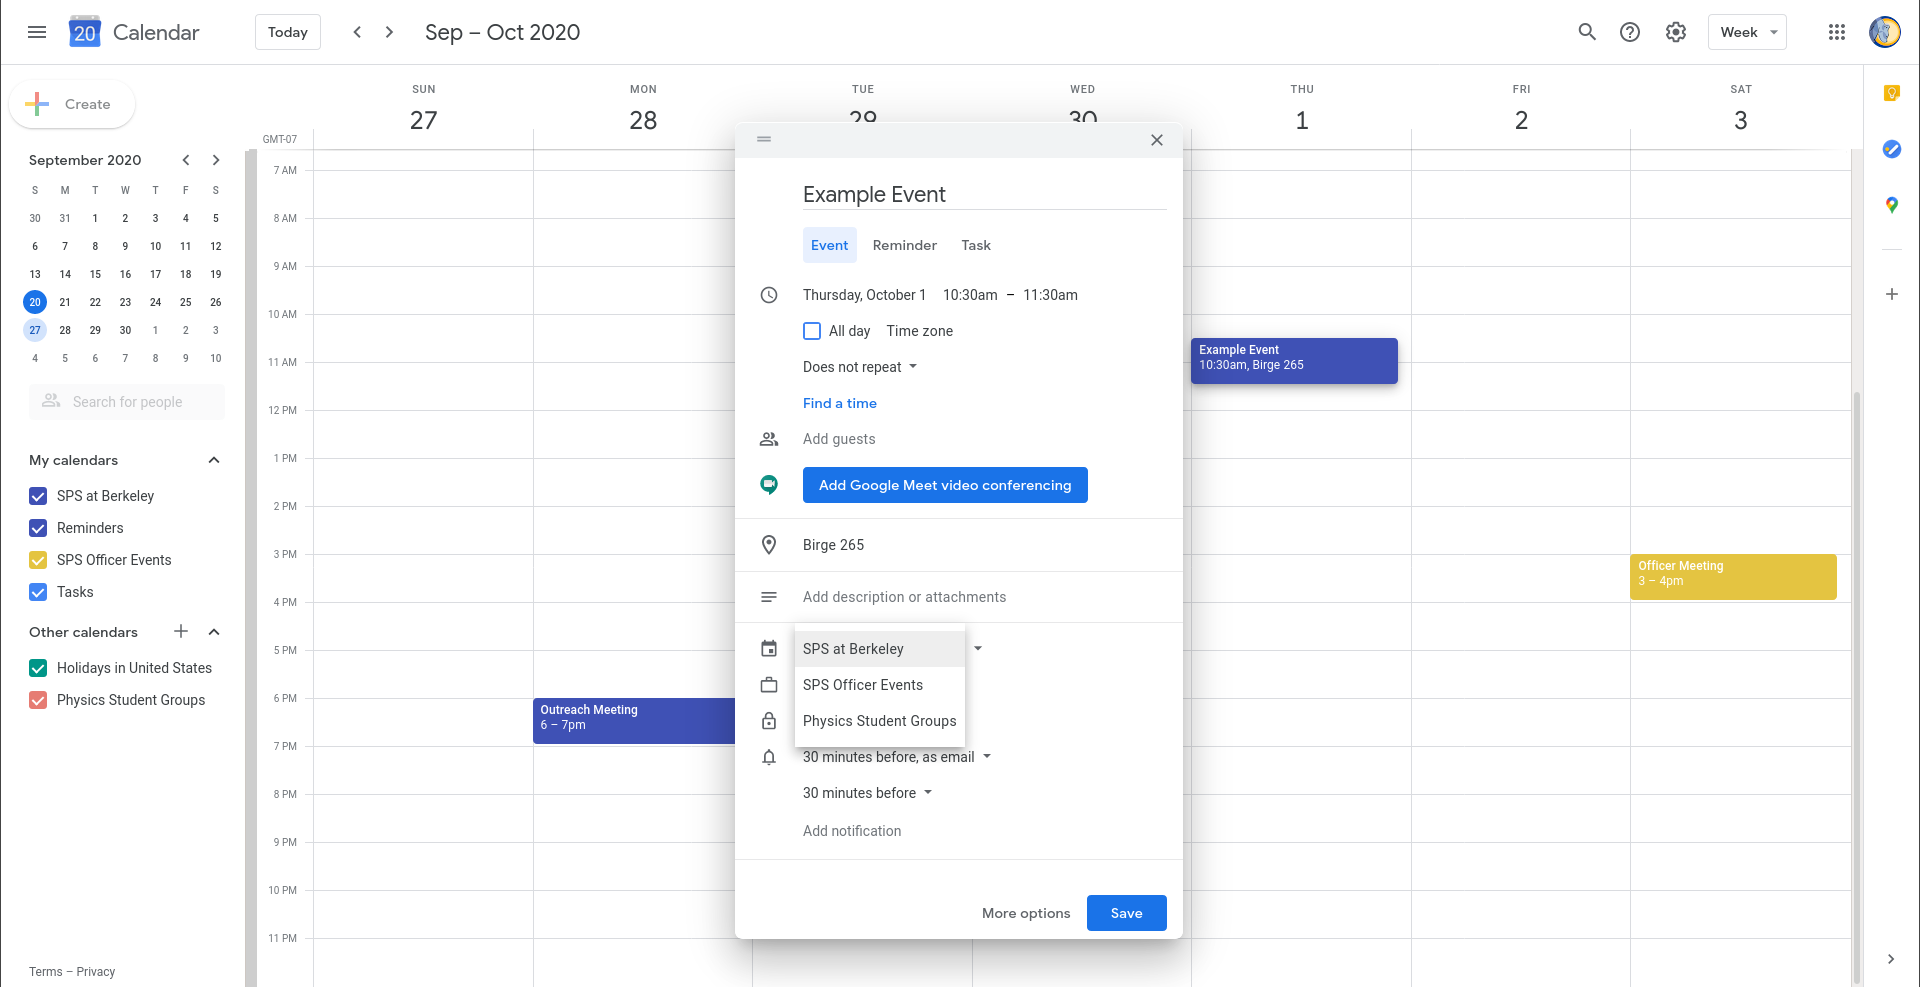
Finally, press Save to finish creating an event.
Editing an Event
Once an event is created, it can be edited. To do this, click on an event to open a pop-up, then click the pencil icon (highlighted in the image below).
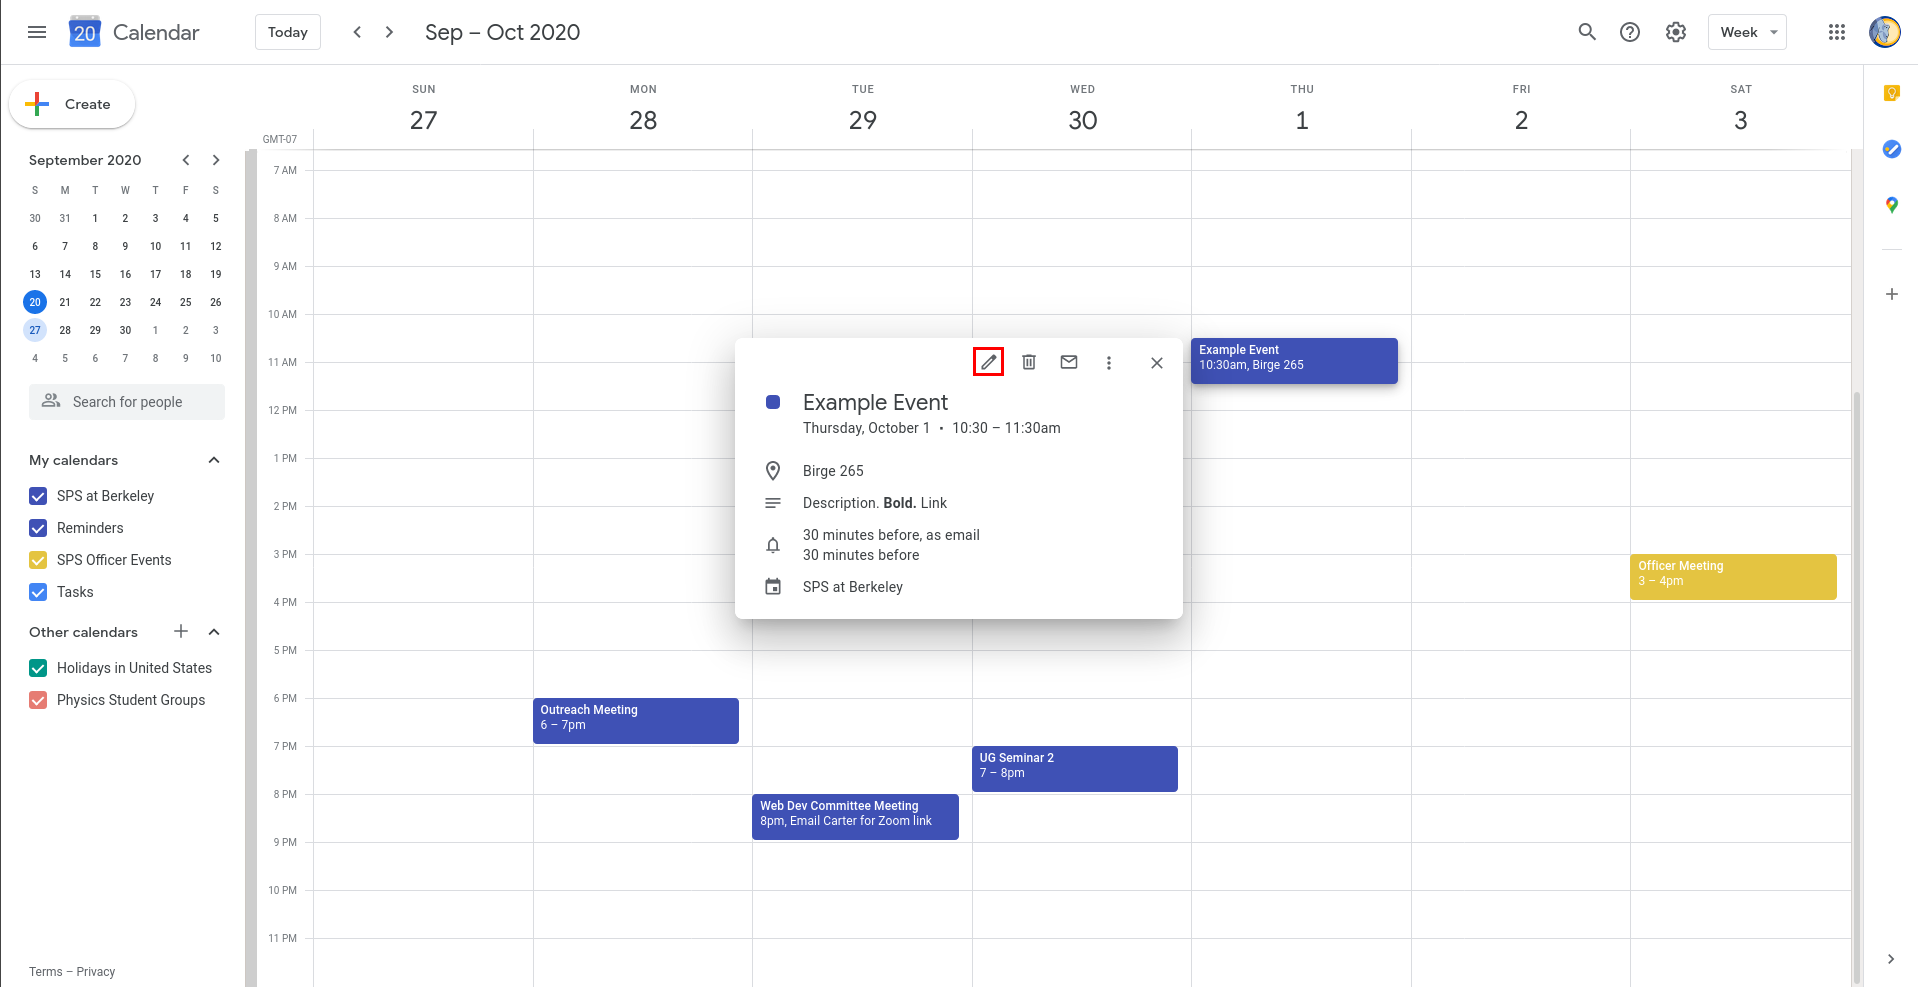
The same title, time, location, calendar, and description options are available here, but they have been rearranged somewhat. Edits can be made here, and saved with the Save button.
